Steampunk Rosette Ring Create Along Box Project
Here's an unexpected way to use a gear cutter: for making steampunk style strips of clay that form a flower shape. Add your rosette to a ring for a unique piece of jewelry.
Tools and Materials:
Metallic polymer clay (I used Premo! Sculpey® Silver)
Tiny Gears Deco Disc (Infinite Possibilities Create Along Box)
Cog Wheel clay cutter (Infinite Possibilities Create Along Box)
Craft knife
Clay blade
Mica powder
3/8 inch steam punk gear (Infinite Possibilities Create Along Box)
Polybonder glue
Filigree ring blank
Liquid clay
Roll out a sheet of clay, any metallic color, on a medium thin setting, 1 millimeter or less thick. Texture this clay by pressing in the Tiny Gears Deco Disc.
Then press in the Cog Wheel clay cutter twice.
Use a craft knife to carefully cut around the inner lines imprinted by the Cog Wheel cutter. Also cut out the center imprint and set aside one circle of clay.
Rub metallic mica powder over the texture to highlight.
Use a blade to remove these clay rings from your work surface. Cut between two of the gear teeth on each to turn your rings of clay into strips.
Roll the set aside circle of clay into a teardrop shape. Add a dab of Polybonder glue, then press a 3/8 inch steampunk gear onto the rounded end of the teardrop. This will be your flower center.
Starting with the gear teeth close to the metal gear flower center, wrap your strip of clay around the tear-drop.
Once you make one wrap around the center start pinching the bottom of your strip to ruffle it and flare it out as you wrap it around.
As you are wrapping the strip of clay around the center twist the bottom of your flower with the hand that is holding it too meld the clay together and thin out the bottom.
When you reach the end of one strip of clay start where you left off, adding the second one in the same manner.
Once you've wrapped the second strip around, take a little time to press the bottom edges of the clay strips into the back, twisting and thinning the “handle” you've been holding it by. Then use a blade to trim the handle off flush so you have a rosette that is flat on the back.
Bake your rosette at the manufacturer's recommended temperature for at least 30 minutes.
Press a small ball of the same clay you used for your rosette onto the back of your ring blank, making sure that some of the clay comes out through the holes in the filigree.
Now add a small ball of clay to the front of the ring blank, sandwiching the ring between the clay. Make sure these two balls of clay contact each other through the ring. When baked this clay will hold firmly in place on your filigree.
Add liquid clay to this ball of clay, then press in your baked filigree.
Bake your ring one more time for 30 minutes.
You can use a bit of scrap clay to prop your ring upright for the second baking.
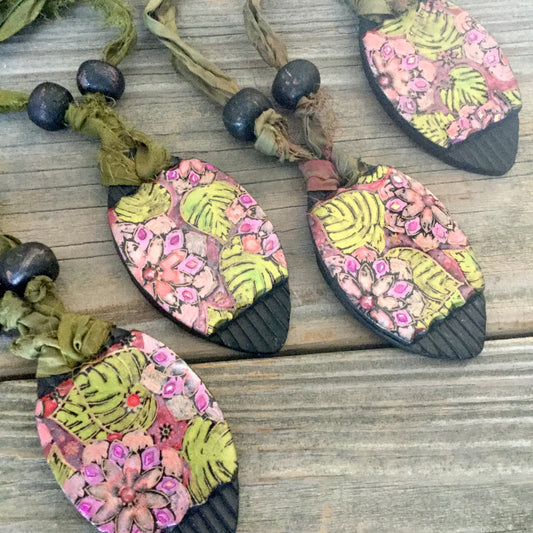
Lotus Pond Pendants - Create Along Box


Crackled Gold Pendants - Vintage Grunge Create Along Box
Sandy Huntress shares these lovely pendants made tithe Vintage Grunge Create Along Box!
Materials:
polymer clay, rolled into 1/2 inch to 1 inch log
Gold Leaf Shavings (Vintage Grunge CreateAlong box)
Clay blade
Acrylic block
Vintage Keys Deco Disc (Vintage Grunge CreateAlong box)
Vintage Grunge Magic Transfer Paper (Vintage Grunge CreateAlong box)
Would you like to join the fun and receive an inspiring box full of polymer clay supplies each month? Sign up to receive your own Create Along Box- Follow this link
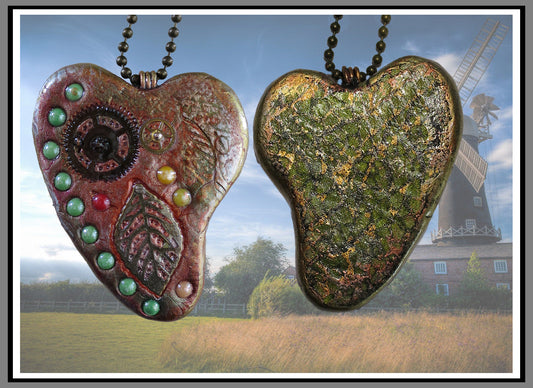
Autumn Steampunk Heart Pendant - Create Along Box Project
Patricia Krauchune created this mixed-media Steampunk autumn heart pendant with many items from the "Fall-ing In Love" Create Along Box.
Leaf Veins Silkscreen / Falling in Love rubber stamp texture sheet/ Copper mylar grunge foil / Antique Gold Leaf Charm / Ceramic Hotfix Cabochons /
Cernit polymer clay
Autumn Leaves Beads - Create Along Box Project
Klio Tsaliki shares absolutely gorgeous autumn beads made with the "Fall-ing In Love" Create Along Box!
Fall leaf shaped beads made of Cernit metallic hues. Awesome silk screen included in the box.
Heart shaped leaf beads using the texture mat found in the box.
Cernit metallic skinner blend was textured and then shaved (mica shift technique).
Again leaf shaped beads with the application of the foil included in the box. Although it was not 100% successful, it added a beautiful effect.
Foil was applied first on a Cernit metallic Skinner blend, then I textured the clay and shaved it (mica shift technique).
The random golden shine is really beautiful.
This was a BEAUTIFUL fall Create Along Box! I was already in fall and leaves mood, so it couldn’t come in a better moment!
Would you like to join the fun and receive an inspiring box full of polymer clay supplies each month? Sign up to receive your own Create Along Box- Follow this link
Falling Leaves Embossed Bookmarks - Create Along Box Project
Sandy Huntress shares this clever idea for making bookmarks with contents from the most recent "Fall-ing In Love" Create Along Box! Stay tuned for Sandy's video tutorial for this project!
These bookmarks make quick, easy gifts that are perfect for tucking into a birthday or thinking of you card.
For bookmark base: faux leather, or 3/4-inch wide iron-on trim tape
Acrylic block
Ceramic tile
Versamark ink
Anti-static powder tool
Falling in Love texture stamp (CreateAlong)
Embossing powder
Tiny brush
Nylon jaw pliers
3/4-inch ribbon ends (CreateAlong)
Small pieces of chain
Charms
Jump rings
Chain nose pliers
Would you like to join the fun and receive an inspiring box full of polymer clay supplies each month? Sign up to receive your own Create Along Box- Follow this link
Turquoise & Leaves Pendant - Create Along Box
Cindi McGee shares her "Turquoise & Leaves" pendant made with items from the Fall-ing in Love/Autumn Leaves Create Along Box! She used the rubber texture stamp, Grunge Foil& Hot Fix Cabochons
Boo to You! Halloween Create Along Box

Shimmering Ripples & Waves - Create Along Box Projects


Wavy Photo Frames - Ripples & Waves Create Along Box
Sandy Huntress used the Waves Border mold to create sweet little photo frames that can be used as fridge magnets, ornaments or given as lovely gifts!
Tools and Materials for Ocean Waves Photo Frame:
white polymer clay
embossing powders, optional
circle cutters: 2", 2 1/4", 2 1/2"
liquid clay
Waves border mold (October Create Along box)
ceramic tiles
clay blade
Sapphire Blue metallic paint (October Create Along box)
Would you like to join the fun and receive an inspiring box full of polymer clay supplies each month? Sign up to receive your own Create Along Box- Follow this link
Artist Trading Coins - Paisley Create Along Box
Cindi McGee used a number of the items in the Paisley Create Along Box to create two polymer clay trading coins.
For this blue and gold coin, the Deco Disc included in the box was used to create the fabulous texture highlighted with gold.
The silkscreen and hot fix crystals were used to create this magenta and turquoise coin.
Both of these could easily be altered into eye-catching pendants with the addition of a simple bale.
Would you like to join the fun and receive an inspiring box full of polymer clay supplies each month? Sign up to receive your own Create Along Box- Follow this link
Paisley Purple Altoid Tin - Create Along Box

Paisley Collection - Create Along Box


Creations from the Enchantment CreateAlong Box


Captured Fairy Jar - Enchantment Create Along Box
Cindi McGee has been having fun creating mixed-media projects with elements from the Enchantment Create Along Box.
After discovering recently that etchall® Creme works wonderfully with Create Along silkscreens to etch glass, she's been anxious to try the technique again and again.
This "Captured Fairy" jar was created by etching with the Enchanted Rosevine silkscreen. The fairy inside is made of polymer clay using one of the fairy images on the Magic Transfer Paper in this month's box.
Cindi shared a full tutorial on how she created this project on her blog.
Would you like to join the fun and receive an inspiring box full of polymer clay supplies each month? Sign up to receive your own Create Along Box- Follow this link
Enchanted Rose Pendant - Enchantment Create Along Box
Sandy Huntress created this pretty Enchanted Rose Pendant with items included in the "Enchantment" Create Along Box!
Learn how to sculpt a delicate rose under glass reminiscent of the one in the beast's castle in Beauty and the Beast, then use it to create your own enchanted piece of jewelry.
The video tutorial for this project is in DropBox: https://www.dropbox.com/s/jhusvgifxvpjwjb/enchanted%20rose%20pendant.mp4?dl=0
Supplies:
bronze clay
pearl clay
green clay
Mini Terrarium glass pendant kit
Rose Trellis flexie stencil or Tudor Rose Deco Disc
Armor All
Liquid clay
craft knife
clay blade
1/8 inch ball tool
scrap of paper or index card
Would you like to join the fun and receive an inspiring box full of polymer clay supplies each month? Sign up to receive your own Create Along Box- Follow this link
Beads Aplenty with the By the Sea Create Along Box


Mermaid Pool Mixed-Media Box - By The Sea Create Along Box
Sandy Huntress used items from the By The Sea Create Along Box to create this fantastic decorative mixed-media box!
This sweet little box is the perfect place to store all your beachy treasures! Cover it in textures from the Motion of the Ocean stamp, then add pearly shimmer if you like. Use shells, beads and charms to create a mermaid pool topper. You can tell a mermaid just left by the sprinkling of sand and scales she left behind.
Would you like to join the fun and receive an inspiring box full of polymer clay supplies each month? Sign up to receive your own Create Along Box- Follow this link.
Video is at https://www.dropbox.com/home/Create%20Along%20Videos?preview=Mermaid+Box+CreateAlong+July+2018.mp4
Mermaid Pool Box Tools & Materials:
paper maché box
assorted clay colors in blues, greens and whites
Motion of the Ocean Texture sheet
Acrylic roller
Pearly Pigment Powder
Ruler
Pasta Machine
Clay blade
TLS
Assorted shells, beads, pearls, etc.
Small amount of black, gray, white & brown clay for rocks
Embossing powders in ocher & beige
Polybonder glue
Magic Glos UV resin
Ocean Themed Polymer Clay Pendants - By the Sea Create Along Box
Cindi McGee has been using many of the items from the By the Sea Create Along Box to create summer pendants.
She used the seashell printed Magic Transfer Paper to create the background for this starfish pendant.
Cindi used the nautilus shell silkscreen, the Motion of the Ocean rubber stamp, and a metal starfish and clam shell charms from the box to create this unique gold & blue pendant.
She also used the nautilus shell silkscreen, the Motion of the Ocean rubber stamp, one of the metal starfish charms, and some of the glass beads from the box to create this open centered dimensional pendant. Cindi will be sharing a tutorial for this pendant in the August PCU Magazine!
Would you like to join the fun and receive an inspiring box full of polymer clay supplies each month? Sign up to receive your own Create Along Box- Follow this link.
Mixed-Media Mermaid Shrine - By the Sea Create Along Box Project
Pat Krauchune shares this amazing mixed-media mermaid shrine done in the style of Laurie Mika who she truly enjoyed learning from as part of a past Polymer Clay Adventure. Pat used the following materials from her June By the Sea Create Along Box: The Motion of the Ocean - special edition rubber stamp texture sheet / Cockle Shell flexie stencil / Nautilus and starfish silkscreen /Glass beads / Pearly Pigment powder / Charm chain featuring shells and starfish. She also used a small block of wood / Souffle polymer clay / gears /eyelets / mica powders / glass micro beads /hands and face mold. Wow!
Would you like to join the fun and receive an inspiring box full of polymer clay supplies each month? Sign up to receive your own Create Along Box- Follow this link.
Japanese Influenced Pendant - Create Along Box Project
Cindi McGee created this bold Japanese influenced pendant with her Japanese Influenced Create Along Box! Items she incorporated from the box include:
The resin coating obscures the ginkgo texture a bit in the photo - but you can see how fabulous the texture sheet worked in this "in progress" photo.
Would you like to join the fun and receive an inspiring box full of polymer clay supplies each month? Sign up to receive your own Create Along Box- Follow this link.
Koi Switchplate Cover - Japanese Influence Create Along Box


Reina Dragonfly & Earrings Galore - Dragonfly Dreams Create Along Box


Dragonfly Sphere - Dragonfly Dreams Create Along Box