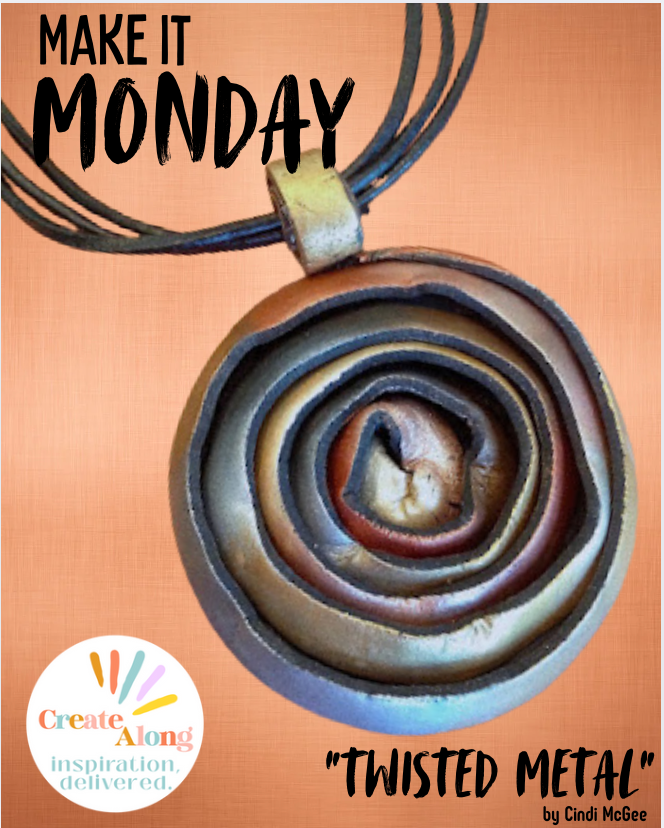
Let's Do the Twist! Twisted Metal Polymer Clay Pendant

A bold pendant combining black clay and a variety of metallic tones for a metallic effect that blends from one shade to the next beautifully. The irregularly coiled clay adds dimension and added interest to this bold accent for your wardrobe.
Materials:
Black Sculpey® Premo!
DecoArt® Metallic LustreTM - Champagne Ice, Rose Gold, Burnished Brass, Gold Rush, Silver Spark, Iced Expresso, Copper Kettle, Black Shimmer
Liquid clay or Sculpey® Bake & Bond
Clay Extruder and rectangular slot disc
Texture sheet of choice
Round Clay Cutter Set
Clay tools Black leather cording
Metallic jump rings, crimps with rings, closure
Jewelry pliers
Instructions:
Step 1. Fill barrel of the extruder with black clay and add rectangular slot. Extrude all clay.


Step 2. Begin applying Metallic Lustres to extruded clay with fingers, in sections approximately 1/2” to 1”, blending where each shade meets. I applied the Lustres in the following order ChampagneIce, Rose Gold, Copper Kettle, Iced Expresso, Black Shimmer, Silver Spark, Burnished Brass, Gold Rush, then began and repeated the pattern until the entire extruded piece of clay was colored.


Step 3. Roll a separate piece of black clay to approximately 1/8” thick.
Step 4. Place Coils texture sheet over rolled clay, gently press to
transfer texture to rolled clay.


Step 5. Use 60 mm circle cutter (or desired size circle for finished pendant) to cut circle from textured clay.

Step 6. Turn textured clay circle over. Beginning in the middle, coil the metallic shaded clay strip, allowing it to stay somewhat “upright” and not lie flat, and compressing slightly with fingers to push some areas into each other - your goal is to get a somewhat irregular coil, with dimension. One full barrel of extruded clay was exactly enough to fill the circle of clay I used, if necessary for your project, extrude additional clay and repeat
coloring process as necessary. Bake according to manufacturer instructions. Let cool.
 .
. 
Step 7. Flip over coiled pendant, and apply Metallic Lustres in a random pattern over the textured back, highlighting the raised areas.

Step 8. Extrude an additional small amount of clay - the piece I used was about 4” in length. Repeat metallic coloring procedure with whatever metallic shades you choose. To make the bail for the pendant begin coiling the clay strip in a tight coil, leaving one end
uncoiled for about 1”. Apply a small amount of liquid clay or Bake & Bond and mount flat end to the back of the pendant (the textured side). Add a touch of adhesive to the top of the pendant and mount the front of the coil. Bake according to manufacturer instructions.
 .
. 
Step 9. Use clay tool to make a hole large enough to pass through three strands of leather cording in center of coiled bail. Let pendant dry 24 hours.
Step 10. String clay pendant on 3 strands of leather cording. Add crimps to the ends of the cording. Add jump ring to each end to bring the 3 strands together. Add closure.

Like this tutorial? PIN IT and share it with others!

